Showing posts with label Basics. Show all posts

2/10/12

Recipe: How to Roast a Pastured Chicken

While at Windy Ridge Natural Farms, we picked up a few things - a dozen eggs, a roaster, and a whole rooster for stewing. On top of that bounty, Tim was nice enough to send us home with some pink potatoes, his own Provencal herb mix, a stack of information about his farm and like-minded organizations, and a simple recipe card.

We really appreciate when pastured meat farmers provide recipes. While we don't always use the actual recipes, they generally highlight the best method for cooking their product. We often hear people say they don't like grass-fed beef or free-range chicken because it's too tough, rubbery or sinewy. The thing is: some people don’t realize they have to treat pastured meat differently than conventional meat. It can be tough or rubbery, but when prepared properly it's really, really good! It's all about sharing information, and that's one of the main reasons we write this blog. 

So when we glanced over this recipe card, we were excited to see that Tim suggests a different technique for cooking his birds - about 2 hours in a cooler oven. We've always roasted our birds at 350 for an hour and often the dark meat is, while much deeper in flavor, kinda... rubbery! Well, duh!! That’s because these birds are actually moving their legs! And with the more active muscles - shoulders, necks, shanks, & thighs - the motto is always: slow and low. Why we never connected the dots is beyond us!

Well, we couldn't wait to try this new method! And we decided we might as well do a whole Windy Ridge dinner - the chickens, herb mix, and pink potatoes! (There is something so satisfying about eating a meal that all comes from one farm.) Not surprisingly the low and slow method worked like a charm! Farmer knows best!

Windy Ridge’s Roast Chicken

+ 1 roaster - about 4.5 lbs
+ 2 tbsp Herbs De Provence (a mix of thyme, savory, lavender, fennel and whatever else you'd like)
+ 2 tbsp extra virgin olive oil
+ 1 tbsp coarse grain salt

For Gravy:
+ 1/2 cup dry white wine - we love Dr. Franks Dry Riesling
+ 2 tbsp butter 
+ 1 tbsp flour

1. Preheat oven to 300. Place a skillet big enough to hold the bird in the oven while it's heating.
2. Rinse and dry the chicken. Rub olive oil all over bird, then the herbs and salt.
3. When the oven has heated remove the skillet, put the bird in breast side up and place back in oven. Cook for 1 ¾ hrs.
4. Take the chicken out of the skillet and let stand for 10 minutes. In the meantime, place the skillet with drippings on the stove over medium heat. Whisk in ½ cup white wine and let reduce by half. Then whisk in 2 tbsp of butter and one tbsp of flour. Cook until thickened and serve over carved chicken.

1/23/12

Sunday Dinner: The Perfect Steak

It was a busy weekend for both of us - Jake spent most of his time at the Museum of the Moving Image attending a David Cronenberg retrospective while Silka worked on various freelance projects - so for Sunday's dinner we planned to keep it classic and simple. What's more classic, simple or just plain better than a French Bistro-style steak? Let us answer that for you...nothing! This particular steak dinner was also an excuse to vet yet another new beef stand at the Market - Sun Fed Beef.

When getting to know a new beef farm, we'll try out one of our three most commonly cooked steaks -  sirloin, hanger, or London broil. Sun Fed's hanger looked really beautiful so we went for it. Now, it's no secret that we like a strong taste of iron in our beef, which is really to say that we like the taste of blood. And no steak has a stronger, beefier, bloodier taste than the hanger. It's actually known as the "Butchers' Steak" because there is only one per animal and traditionally butchers would take it home for themselves. 

Well, Sun Fed's steak did not disappoint! It was beefy, tender and beautifully cut.  We paired it with some perfectly roasted fingerlings, mixed greens and a stiff drink and settled into a cozy Sunday evening.

A Perfect Bistro Steak

Even though steak is incredibly easy to cook, many people seem to be intimidated by it. The directions below are a sure-fire way to make the most of your steak. We use a meat thermometer, but you'll be fine without one.

+ 1 hanger steak
+ 2 tablespoons of butter
+ course sea salt
+ freshly ground black pepper

1. An hour before cooking, remove steak from refrigerator and let come to room temperature. 30 minutes before, preheat your oven to 350 degrees.
2. Pat steak dry with paper towel and salt heavily.
3. Place a dry oven-safe skilled on high-heat. When smoke starts to come off the pan, add steak. Sear on one side for about 90 seconds - the steak is ready to flip when it releases itself from the bottom of the pan. Flip onto other side for another 90 seconds.
4. Place a tablespoon of butter on top of the steak. Remove pan from stove top and put in oven. Roast for about 7 minutes for rare. If you are using a digital thermometer, cook to 120. We use the kind that you can keep in the meat while it's cooking.
5. Remove steak from pan immediately and place on cutting board. Add the remaining tablespoon of butter on top, top with freshly ground pepper and let rest for another 7 minutes before serving.

Serves 2

1/11/12

Tools of the Trade: Potato Ricer

Jake has been obsessively researching his family tree recently, and in a genealogical craze we started to talk about how many of the objects in our kitchen are actually a huge part of the same history. So many of the tools that cover our kitchen walls and fill our draws have been inherited from our parents and grandparents. And with that history comes quality... the phrase: "they don't make 'em like they used to" comes to mind. It's amazing that these tools are still kicking ass in our kitchen some 60 years after they were originally purchased, and that they probably have another 20 in them!

Jake’s grandmother’s potato ricer is probably the most-used heirloom in our collection. It's of the giant-garlic-press variety and has a simple, utilitarian beauty that really sets it apart from the other "objets dart" lining the walls. While a ricer is great for making fluffy mashed potatoes or hash, we love it most for potato gnocchi. (Potatoes play a huge role in the history of Jake's family, which is a story for another post!)

Even more than fresh pasta, there really is nothing quite like homemade gnocchi. The most perfect gnocchi are nothing more or less than light fluffy clouds - and as far as we can tell that texture is only achieved by using a ricer (or, we've also heard, a food mill.) We picked up some Russet potatoes from Race Farm at the Union Square Green Market and, with just a little work, we sat down to the strongest potato-y tasting clouds we'd ever tasted - sweet, earthy, and creamy. And just like fresh pasta, gnocchi is super easy to make... you just have to be willing to get your hands a little dirty.


Potato Gnocchi
Adapted from Mario Batali

+ 3 pounds russet potatoes
+ 2 cups all-purpose flour
+ 1 egg
+ 1 pinch salt
                        
1. Steam the whole potatoes until they are soft and a knife goes through easily (about 1 hour).
2. While still warm, peel potatoes and pass through a food mill or ricer onto a clean cutting board or counter. Meanwhile, set a large pot of water to boil. 
3. Make a mound with the riced potatoes, with a well in the center. Sprinkle all over with the flour and place the egg and salt in center of well. Using a fork, stir into flour and potatoes. Once egg is mixed in, bring dough together, kneading gently until a ball is formed and is dry to touch.
5. Roll a baseball-sized ball of dough into 3/4-inch diameter dowels and cut dowels into 1-inch long pieces. Lightly roll pieces off of the back of a fork, creating a groove.
6. Prepare an ice bath. Drop the gnocchi, in batches, into the boiling water and cook until they float (about 1 minute). Meanwhile, continue with remaining dough, forming dowels, cutting into 1-inch pieces and flicking off of fork. 
7. As gnocchi float to top of boiling water, remove them and put into the ice bath. Continue until all have been cooled off. Let sit several minutes in bath and drain from ice and water. Prepare as desired.

Makes enough gnocchi for 6 people.

11/7/11

Recipe: Cookies for Susie

Last week we lost an incredibly special person, someone who played an indescribable role in our lives. Susie was an amazing and inspiring artist, Jake's best friend, a confidant and a mentor. It's not often one meets a person like Susie, and we are so lucky have to had someone like her in our lives.

Susie would often join us for dinner in the Berkshires and bowl us over with her enormous appetite. Despite her thin frame, she would plow through the meal like a lumberjack. She was a professional cook
for years but never cooked for herself at home. The staple of her diet, and her favorite food, was the cookie. She would wake up at the crack of dawn, go to her kitchen, grab a couple cookies and get back in bed to read or listen to NPR until it was time to get up and paint.

This post is our way of remembering Susie’s beauty, wisdom, and joyful quirks. While we miss her terribly, we know her infectious laugh and unfailing warmth will be with us every day - and every time we reach for a cookie.


Classic Toll House Chocolate Chip Cookies

+ 2 1/4 cups all-purpose flour
+ 1 teaspoon baking soda
+ 1 teaspoon salt
+ 1 cup butter, softened
+ 3/4 cup granulated sugar
+ 3/4 cup packed brown sugar
+ 1 teaspoon vanilla extract
+ 2 large eggs
+ 1 (12 ounce) package chocolate chips

1. Preheat oven to 375 degrees F.
2. Combine flour, baking soda and salt in small bowl. Beat butter, granulated sugar, brown sugar and vanilla extract in large mixer bowl until creamy. Add eggs one at a time, beating well after each addition. Gradually beat in flour mixture. Stir in chocolate chips. Drop by rounded tablespoon onto ungreased baking sheets.
3. Bake for 9 to 11 minutes or until golden brown. Cool on baking sheets for 2 minutes; remove to wire racks to cool completely.

11/4/11

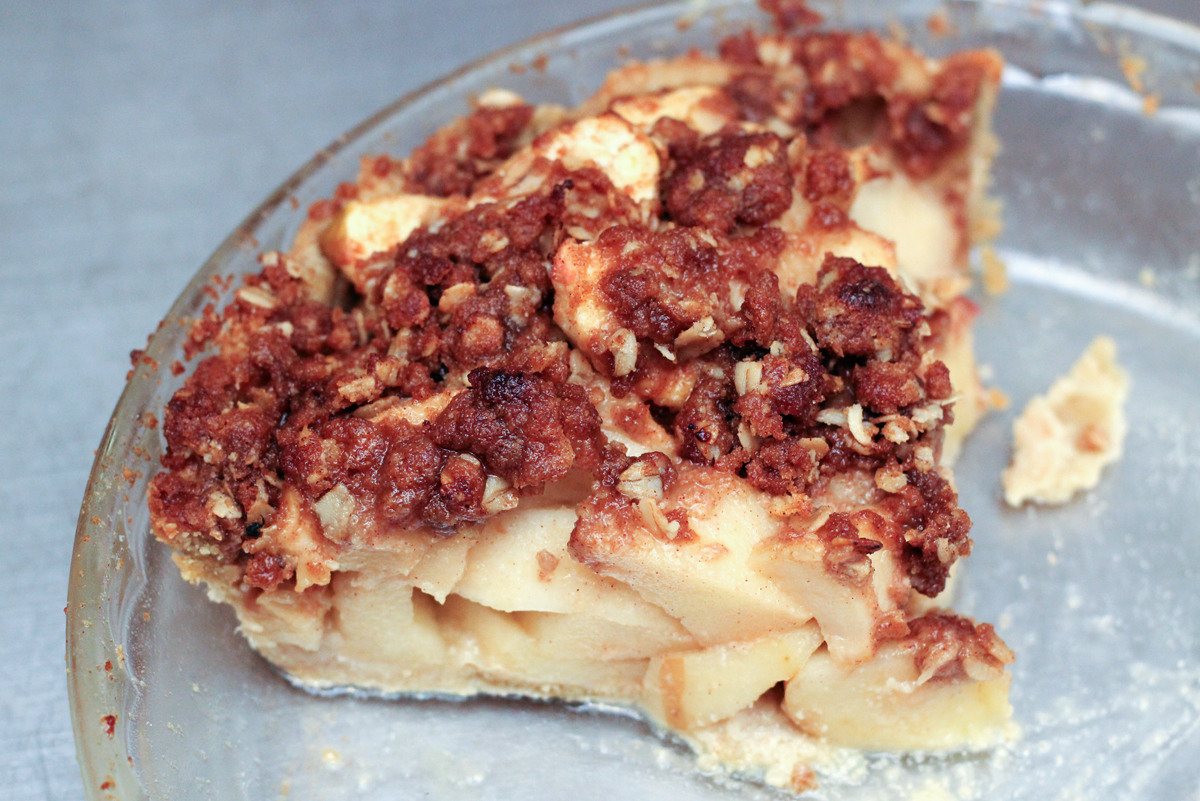
Recipe: Crumble-Top Apple Pie

As a food-obsessed couple, we're somehow lucky enough to agree on most preferences. Local and seasonal? Check. Earthy, gamy foods? Check. Lots of Brussels Sprouts and Kale? Check. Bacon? Check! Ok, that's an easy one. But the one thing we can't agree on? Pie versus crumble. Silka likes the crunchy chunks of a crumble's topping while Jake much prefers the flaky crust of a traditional pie.

But now that it's fall, we're picking up a half dozen apples every time we go to the market. And when we get home, we're left with the same question: How are we going to get through all of these apples before we go to the market and thoughtlessly pick up another half dozen just because they are there and beautiful and we can't help it? Silka generally tries to avoid the pie/crumble conflict by making apple cakes, bread and sauces. But this week she really wanted a crumble, so we decided to compromise with an crumble-topped apple pie. Nick Malgieri's flaky pastry crust, made with wheaty Cayuga flour and rich Ronnybrook butter, was the perfect compliment to a mix of Migliorelli Jonagold and Macoun apples. Topped with an oatmeal and molasses crumble and some vanilla ice cream, it was something we could both agree on.


Flaky Pie Crust
From Nick Malgieri's Bake!
 
+ 1 1/4 cups all-purpose flour
+ 1/4 teaspoon salt
+ 1/8 teaspoon baking powder
+ 8 tablespoons (1 stick) cold unsalted butter
+ 2 to 3 tablespoons cold water
 
1. To mix the dough by hand, combine flour, salt and baking powder in a medium sized mixing bowl and stir well to mix. Cut butter into 1-tablespoon pieces and add to dry ingredients. Toss once or twice to coat pieces of butter. Then using your hands or a pastry blender, break the butter into tiny pieces and pinch and squeeze it into the dry ingredients. Keep the mixture uniform by occasionally reaching down to the bottom of the bowl and mixing all the ingredients evenly together. Continue rubbing the butter into the dry ingredients until the mixture resembles a coarseground cornmeal and no large pieces of butter remain visible. 
2. Sprinkle the minimum amount of water over the butter and flour mixture and stir gently with a fork the dough should begin holding together. If the mixture still appears dry and crumbly, add the remaining water, 1 teaspoon at a time for the smaller quantity of dough, a tablespoon at a time for the larger quantity, until the dough holds together easily.
3. To mix the dough in the food processor, combine flour, salt and baking powder in work bowl fitted with metal blade. Pulse 3 times at 1-second intervals to mix. Cut butter into 1-tablespoon pieces and add to work bowl. Process, pulsing repeatedly at 1-second intervals, until the mixture is fine and powdery, resembles a coarse-ground cornmeal and no large pieces of butter remain visible. About 15 pulses in all.
4. Scatter the minimum amount of water on the butter and flour mixture and pulse 5 or 6 times. The dough should begin holding together. If the mixture still appears dry and crumbly, add the remaining water, 1 teaspoon at a time.
5. Turn the dough out onto a lightly floured surface and form it into a disk. Sandwich the disk of dough between two pieces of plastic wrap and press it into a 6-inch circle. Refrigerate the dough until firm, or until you are ready to use it, at least 1 hour. 


Crumble Topping 
Adapted from this recipe

+ 1/2 cup golden brown sugar - we used just under 1/2 cup granulated sugar and 1 tablespoon of molasses
+ 1/2 cup flour
+ 1/2 cup old-fashioned oats
+ 1 1/2 teaspoons ground cinnamon
+ 1/4 teaspoon salt
+ 6 tablespoons (3/4 stick) chilled unsalted butter, diced

1. Mix oats, cinnamon, salt, golden brown sugar and flour in medium bowl. Add chilled butter and rub in with fingertips until moist clumps form.


Crumble-Top Apple Pie

+ Completed crust dough
+ Completed crumble
Filling: 
+ 6 cups thinly sliced, peeled apples (6 medium) - we like to use a mix of Jonagold and Macoun
+ 3/4 cup sugar
+ 2 tablespoons all-purpose flour
+ 3/4 teaspoon ground cinnamon
+ 1/4 teaspoon salt
+ 1 tablespoon lemon juice - we used Apple Cider Vinegar

1. Heat oven to 425°F. Place 1 pie crust in ungreased 9-inch glass pie plate. Press firmly against side and bottom. Fold in top edge to create a small ridge. 
2. In large bowl, gently mix filling ingredients; spoon into crust-lined pie plate. Top with crumble. 
3. Bake for 45 minutes or until apples are tender and crumble is golden brown.
4. Cool on cooling rack at least 2 hours before serving. (We never stick to that rule.)

10/26/11

Butcher's Demo: How to Break Down a Whole Chicken

UPDATED: See below for a simple chicken stock recipe!

For our first butcher's demo we decided to go with chicken. It's the easiest thing to break down, extremely versatile, and probably the handiest "butcher" skill to have at home. When you break down a chicken in your own kitchen, you decide how to cut the pieces - whole legs vs. legs and thighs, whole breast vs single breasts - and how to use them - baked chicken pieces, grilled chicken wings, chicken soup or stew. You're left with the components of a great and easy stock (wing tips, back bone, giblets) and whatever you don't use, you can freeze for later.

We hope you enjoy our first video! These demos are a work-in-progress so we'd appreciate any suggestions, which you can send to cutandbake@gmail.com. Thanks for tuning in!


Simple Chicken Stock

+ the remains of 1 whole chicken (see above)
+ 1 celery rib
+ 1 carrot
+ 1 medium onion, left unpeeled, halved
+ 1 bay leaf
+ 8 whole black peppercorns
+ 4 quarts cold water
+ 1 1/2 teaspoons salt

1. Bring all ingredients to a boil in an 8- to 10-quart pot and skim froth. 
2. Reduce heat, uncover and gently simmer for 3-6 hours, skimming froth occasionally.
3. Strain through a sieve or colander to remove the chicken pieces, and discard the solids.
4. Chill, covered. Once chilled, remove any solidified fat and save for cooking (schmaltz). 5. Use within a week or freeze, well sealed, for up to a year. Bring to a boil before using.

10/12/11

Tools of the Trade: Immersion Blender

For our first Christmas together, Jake gave Silka a Kitchen Aid Immersion Blender. Sure, that may seem like a strange gift. Not romantic or all that unique - more utilitarian, like getting socks from your grandmother. But Silka was impressed. As you know by now, she would be happy to subsist on soup and sauces alone. But until then her (now our) kitchen was missing the most valuable soup/sauce making tool: the immersion blender!

Needless to say, our (then her) kitchen now has two immersion blenders. The amazing, fantastic, life-changing immersion blender turns a chunky soup into a velvety puree in seconds - and you don't have make a mess transferring it into another container. It also allows for much better texture control when blending as compared to something like a Cuisinart. In the summer we use it a lot to make bright green basil pesto or a spicy salsa and in cooler months it's great for creamy tomato sauces, like Jake’s childhood favorite rosa sauce (recipe coming soon, don't worry). But perhaps most excitingly, it allows you to whip up thick, rich homemade mayo in the blink of an eye. See? We said "life-changing"! 

Homemade Mayonnaise

+ 1 cup of oil - we like to use half extra-virgin olive oil and half sunflower oil
+ 1 egg (room temperature)
+ 2 tablespoons of lemon juice or white wine vinegar
+ 1 tsp of dry mustard
+ 1 dash of cayenne
+ 1 dash of salt

1. In a container* pour 1/4 cup of the oil, the lemon juice, spices, and the egg. Blend it on the medium setting until it starts to emulsify (set and look like mayo). This should take just a few seconds.

2. Slowly drizzle the rest of the oil into the container as you continue mixing. It should turn into mayo. Occasionally it doesn't emulsify right- mayonnaise is just one of those mysterious things. If it doesn't work just try it again, it will only take a few seconds. Or take a look at Julia Child's recipe - we hear it's fail-proof. 

There are endless variations on your standard mayo:
Add any of the following in Step 1:
+ a few cloves of garlic makes aioli
+ 2 sprigs of mint - we like to serve it with lamb
+ a bunch of basil
+ a few strands of saffron

Add any of the following at the very end:
+ 1-2 tablespoons dijon mustard
+ 2 tablespoons buttermilk makes homemade ranch - check out a great use for homemade ranch here
+ 1 tablespoon sriracha

*Most immersion blenders come with a handy plastic container which is perfect for making the mayo in. If you have it, use it, otherwise find a tall fairly narrow container, a Pyrex measuring cup or a canning jar. You can also do it in a food processor, but we find that method trickier.