Showing posts with label Tools of the Trade. Show all posts

1/11/12

Tools of the Trade: Potato Ricer

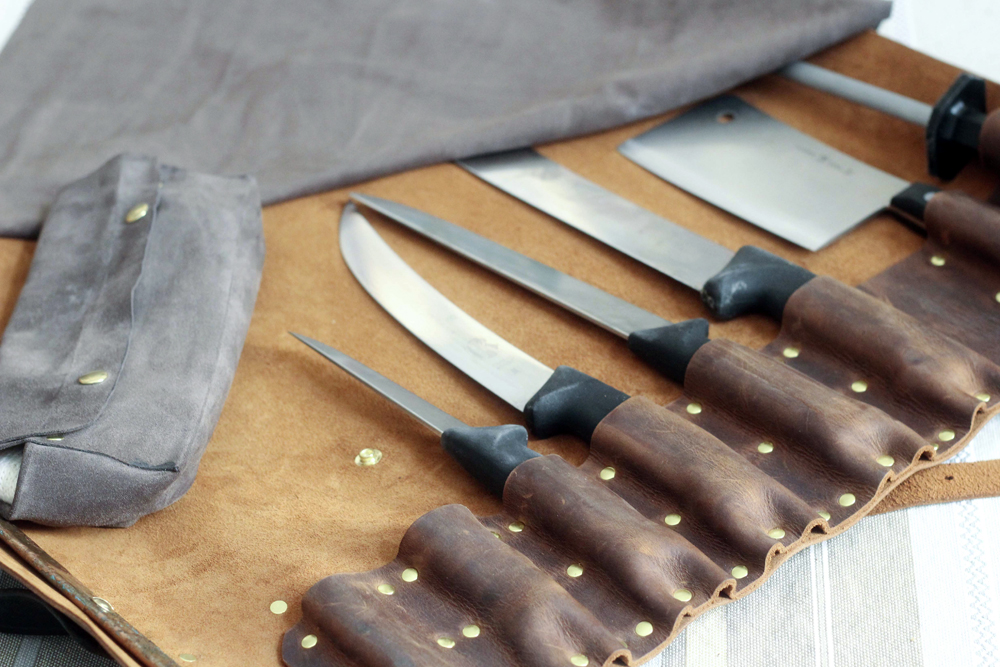
Jake has been obsessively researching his family tree recently, and in a genealogical craze we started to talk about how many of the objects in our kitchen are actually a huge part of the same history. So many of the tools that cover our kitchen walls and fill our draws have been inherited from our parents and grandparents. And with that history comes quality... the phrase: "they don't make 'em like they used to" comes to mind. It's amazing that these tools are still kicking ass in our kitchen some 60 years after they were originally purchased, and that they probably have another 20 in them!

Jake’s grandmother’s potato ricer is probably the most-used heirloom in our collection. It's of the giant-garlic-press variety and has a simple, utilitarian beauty that really sets it apart from the other "objets dart" lining the walls. While a ricer is great for making fluffy mashed potatoes or hash, we love it most for potato gnocchi. (Potatoes play a huge role in the history of Jake's family, which is a story for another post!)

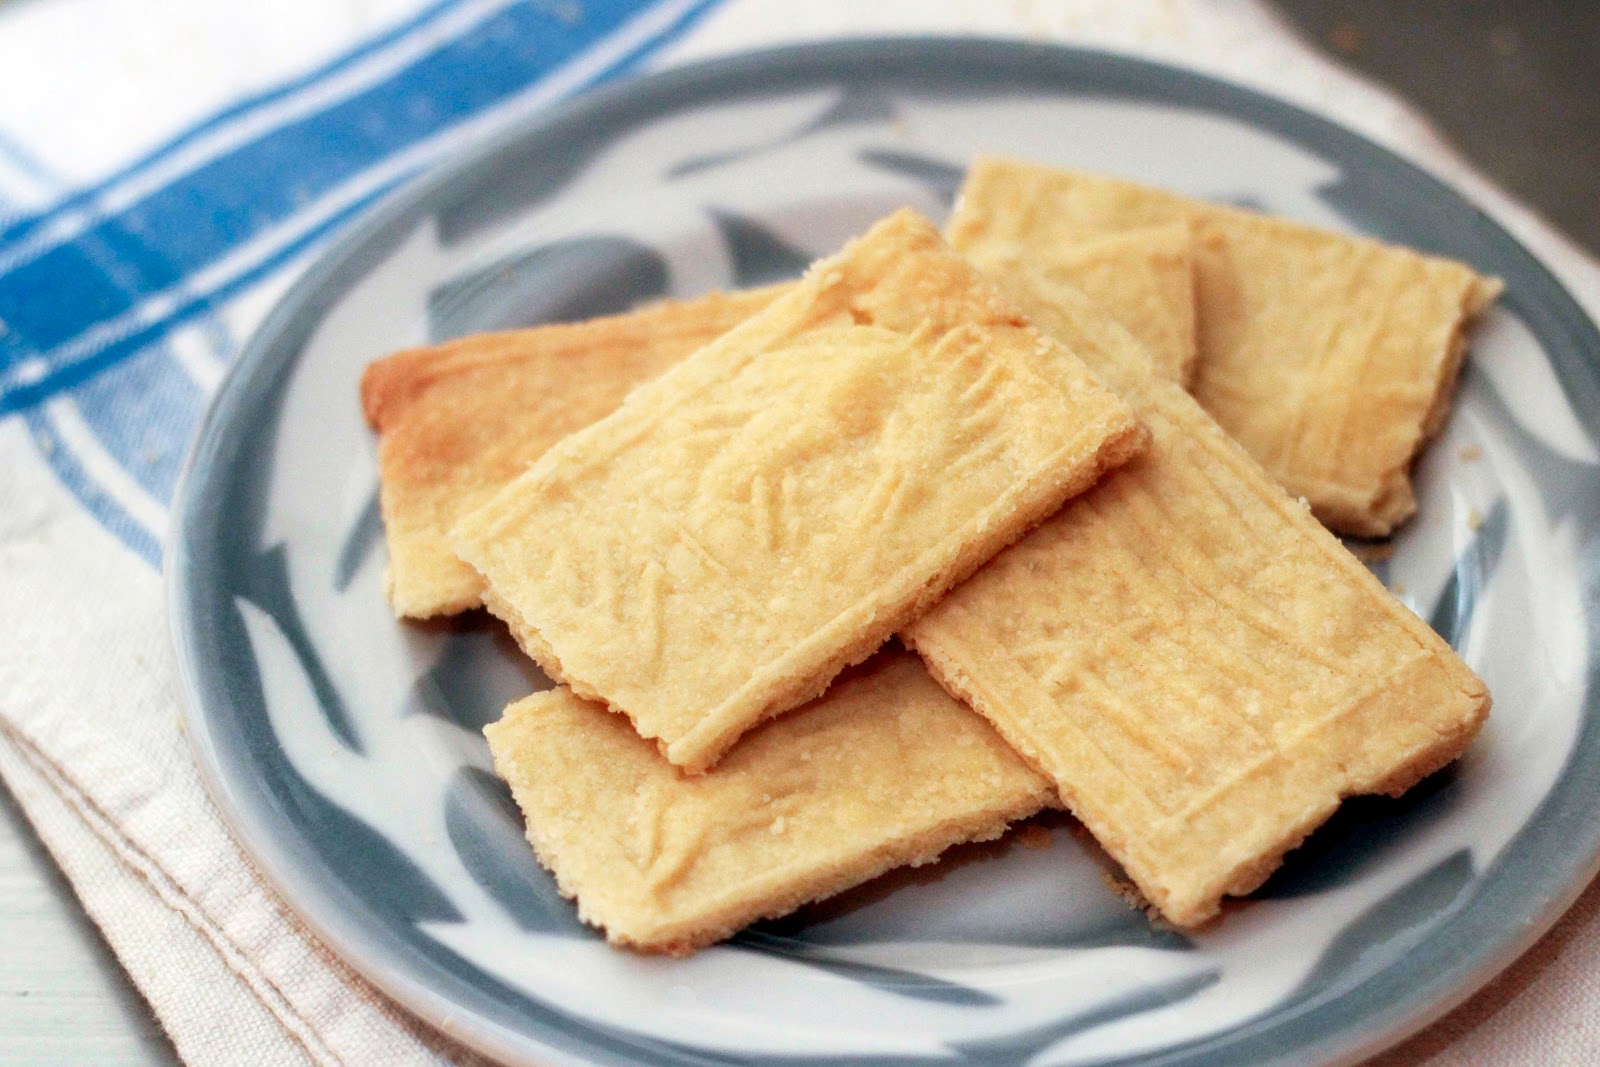
Even more than fresh pasta, there really is nothing quite like homemade gnocchi. The most perfect gnocchi are nothing more or less than light fluffy clouds - and as far as we can tell that texture is only achieved by using a ricer (or, we've also heard, a food mill.) We picked up some Russet potatoes from Race Farm at the Union Square Green Market and, with just a little work, we sat down to the strongest potato-y tasting clouds we'd ever tasted - sweet, earthy, and creamy. And just like fresh pasta, gnocchi is super easy to make... you just have to be willing to get your hands a little dirty.


Potato Gnocchi
Adapted from Mario Batali

+ 3 pounds russet potatoes
+ 2 cups all-purpose flour
+ 1 egg
+ 1 pinch salt
                        
1. Steam the whole potatoes until they are soft and a knife goes through easily (about 1 hour).
2. While still warm, peel potatoes and pass through a food mill or ricer onto a clean cutting board or counter. Meanwhile, set a large pot of water to boil. 
3. Make a mound with the riced potatoes, with a well in the center. Sprinkle all over with the flour and place the egg and salt in center of well. Using a fork, stir into flour and potatoes. Once egg is mixed in, bring dough together, kneading gently until a ball is formed and is dry to touch.
5. Roll a baseball-sized ball of dough into 3/4-inch diameter dowels and cut dowels into 1-inch long pieces. Lightly roll pieces off of the back of a fork, creating a groove.
6. Prepare an ice bath. Drop the gnocchi, in batches, into the boiling water and cook until they float (about 1 minute). Meanwhile, continue with remaining dough, forming dowels, cutting into 1-inch pieces and flicking off of fork. 
7. As gnocchi float to top of boiling water, remove them and put into the ice bath. Continue until all have been cooled off. Let sit several minutes in bath and drain from ice and water. Prepare as desired.

Makes enough gnocchi for 6 people.

1/3/12

5 Days of Christmas and Happy New Year: Jake's New Knife Roll

Happy New Year! For our final Christmas post - and to properly usher in the new year - we wanted to share one of our favorite handmade gifts of 2011.

Since receiving his first set of knives on the first day of his apprenticeship at Fleisher’s, Jake has been asking Silka to sew him a knife roll. The project was a little too intimidating for Silka to tackle herself, but with traveling to and from so many demos lately it's become obvious that Jake really did need something durable and stylish to carry his tools - and this Christmas was the perfect opportunity.

After a little research Silka came across Steve Goodson, a master leather worker living in Texas who specializes in custom knife rolls. He was such a pleasure to work with and in just a few weeks of anticipation a true work of art arrived at our doorstep. Now as we enter another year of demos and events, Jake can proudly carry his knives in his new roll - and we're sure the next year of wear and tear will only enhance it's beauty! Thanks, Steve!

12/30/11

5 Days of Christmas: Vintage Kitchen Tools

As we've already admitted, our kitchen is chock-full of vintage kitchen utensils. Well, space be damned, we received more goodies this Christmas from Silka's mother and father. They scoured some of our favorite Western New York antique and junk shops for a beautiful collection that runs the gamut. From a perfectly working hand egg beater and herb chopper to camping gear made in Brooklyn. Looks like we need a bigger kitchen! Stay tuned!


12/21/11

Tools of the Trade: Springerle Rolling Pin

When Jake moved in, it was a struggle to merge both of our existing kitchens into one functional space. We had to get rid of a lot of duplicate items and it was a trying time, to say the least. But there were a few things that we wouldn't budge on... like anything from either of our vintage kitchen utensil collections. And since there was no room left in the drawers (ok, there were a lot of things we didn't budge on...) we started hanging these items on the  kitchen walls. Of course we haven't stopped collecting and our walls are now covered with tools, many of which we barely know how to use, or even if we can. Not the best strategy for organizing a small urban kitchen, we know, but it works for us.

This Springerle roller is one of Silka's all-time favorites. We picked it up at an antique store in Angelica, NY this summer, but now that we're knee-deep in cookie season,she thought it would be a good time to test it out. Springerle rollers were made specifically for German Springerle buscuits - embossed treats made with eggs, flour, and powdered sugar and placed on anise-sprinkled baking sheets. They've been made since the 1400's, and are often printed with religious iconography. Our's is definitely from the 20th century as it combines that traditional imagery with some pretty random patriotic carvings.

Rather than making the standard Springerle cookie, we decided to make a classic shortbread. We put together a very simple dough and embossed the cookies very lightly, but next time we might get a little more aggressive with our technique. Either way, it was a great feeling to actually get some use out of one of our wall decorations. And now it can go back up on the wall, to remain untouched until next Christmas.  

Shortbread Cookies 

+ 2 cups all-purpose flour
+ 3/4 teaspoon salt
+ 8 ounces (2 sticks) unsalted butter, room temperature
+ 1/2 cup confectioners' sugar
+ 1 teaspoon pure vanilla extract 
 

1. Line 2 rimmed baking sheets with parchment. Wisk together flour and salt. In the bowl of a mixer fitted with the paddle attachment, beat butter until fluffy, 3 to 5 minutes. Add sugar, and continue to beat until pale and fluffy, occasionally scraping down the sides of bowl, about 2 minutes more. Beat in vanilla. Add flour mixture, and mix on low speed, scraping sides if necessary, until flour is just incorporated and dough sticks together when squeezed with fingers. 
2. Turn out dough, forming into 2 disks; wrap each in plastic. Refrigerate until firm, at least 1 hour. 
3. Preheat oven to 325 degrees. Roll out 1 disk to a 1/4-inch thickness. Cut out shapes using desired cookie cutter, and transfer to prepared baking sheets. Reroll scraps. Repeat with remaining disk. Refrigerate until firm, at least 30 minutes. Bake until firm and golden, 13 to 15 minutes. Let cool completely on a wire rack.

Or, if you're using a Springerle roller....
Roll the dough out into a rectangle that is close to the width of your roller on one side. Refrigerate for 15 minutes. Flour your Springerle roller generously, or dust with confectioners sugar, and roll over top of dough. Transfer to baking sheet in one piece and refrigerate for another 15 minutes. Bake for 13 to 15 minutes. Cut with a pizza cutter or sharp knife when just out of the oven (and still a little soft) and carefully transfer to a wire rack.

11/15/11

Tools of the Trade: Standing Mixer with Pasta Attachment

One of the main work horses of our kitchen is our cobalt blue Kitchen Aid standing mixer. It's probably the most expensive tool we have, but it's also the most versatile. Silka uses it for baking (kneading, mixing, whipping) all of the time, while Jake uses it to make sauces and homemade sausage. We'll eventually write love letters to all of it's many uses but, for now we wanted to focus on our current favorite: making fresh pasta!

Let's admit it, more often than not we're too lazy to make our own pasta. And since Eataly is a few blocks away - a.k.a. the pasta mecca of the world, save for... well, Italy - we usually just pick some up. But actually, fresh pasta is as easy to make as it is rewarding. Plus, no shopping! As long as you have some flour and eggs, you can make pasta. And with a standing mixer, all you'll need is a little patience and a few attachments. 


We hadn't made fresh pasta since our discovery, and subsequent addiction to, Cayuga Pure Organics All Purpose Flour, so we were curious to see how it would work as a substitute for All Purpose. The color would definitely be nuttier (which is fine by us) but we were a little worried about the texture and flavor. In the end, while it did take a little more flour than usual, this was the best pasta dough we've ever made! It had the most amazing elastic snap and the flavor of the pasta was sweeter and more hearty without tasting like whole wheat pasta. 

Generally, if we're taking the time to make our own pasta we make a super simple sauce. It's the best way to show off the pasta and, come on, we just spent all that time making pasta! This time we made one of our all-time favorite simple sauces: cacio e pepe, or cheese and pepper (plus butter, olive oil and pasta water). While it's traditional to use Parmesan or Pecorino, we bought some Consider Bardwell’s Equinox which we often use as an aged Italian cheese substitute. It an almost season-less dish, but it was perfect for this early fall evening.

Fresh Pasta
Adapted from Marcella Hazan

+ 4 eggs
+ 2 cups All Purpose flour (plus more if needed)

1. Mound the flour in the mixer bowl and scoop out a deep well in the center. Crack the eggs into the well. 
2. With the paddle attachment, beat lightly until the eggs are fully incorporated into the flour. Turn the beater up a little for for another minute, and test the texture. If it feels sticky, add flour. When you think the dough is ready (i.e. does not need any more flour) wash your hands, drying them completely, and plunge your thumb into the dough. If it comes out clean with no sticky matter on it, no more flour is needed. If your dough still doesn’t seem quite right, it probably will after you knead it. 3. Switch out the paddle attachment for the dough hook. Knead for at least 10 minutes. Following Mario Batali’s advice we like the leave it on kneading for about 30 minutes. The dough should be “as smooth as baby skin.” Let the kneaded pasta sit for 20 minutes. 
4. Attach the rolling attachment to the front of the stand mixer. Cut the dough into 6 equal parts. Begin by putting one part of dough through the widest setting on the roller. Fold it into thirds like an envelope and feed the narrow end through the widest setting again. Repeat 2 or 3 times, then lay the strip of dough on a dish towel. Repeat with the remaining 5 parts. 
5. Once all the dough has been through the widest setting, decrease the roller width a notch and put them all through again. Continue to decrease the rollers’ thickness, passing the dough through until it is to your desired thickness. We go to the arbitrarily-named setting “6,” which is the third-thinnest setting on our roller. As you roll out the sheets place them on a cutting board or baking sheet and sprinkle flour between the layers so they don't stick to each other. The gradual progression from thick to thin is, Hazan says, one of the things that makes homemade pasta so good. So resist the urge to speed things up by skipping some of the intermediate thicknesses.
6. When you have rolled out all of your dough, attach the desired cutting attachment. As you run the dough through the attachment, hang it over a noddle dryer, the back of a chair or the machine itself.
7. Cook the pasta immediately in lots of boiling salted water for 1 1/2 - 2 minutes or until it is al dente. Drain and serve as soon as possible. 

Note: Each machine is different so read your machine's manual to better understand how your attachments work.

Cacio e Pepe
Adapted from Mario Batali and Smitten Kitchen

+ 1/4 cup extra-virgin olive oil
+ 1 pound fresh or dry pasta, like spaghetti or linguine
+ 2 tablespoons butter
+ 4 ounces Pecorino or Parmesan cheese, finely grated plus more for serving
+ 2-3 teaspoons freshly ground black pepper, plus more for serving
+ 3/4 cup of reserved pasta water 
+ salt

1. Bring 6 quarts of water to a boil and add 2 tablespoons salt.
2. In a large saute pan, heat the olive oil over high heat until it is almost smoking. Meanwhile, cook the pasta in the boiling water according until al dente. 
3. Drain pasta after reserving the cooking liquid, and add to the saute pan with the oil. Add the butter, cheese and pepper and toss over high heat for 1 minute. Grate plenty of cheese and black pepper over, and add salt if necessary.

10/12/11

Tools of the Trade: Immersion Blender

For our first Christmas together, Jake gave Silka a Kitchen Aid Immersion Blender. Sure, that may seem like a strange gift. Not romantic or all that unique - more utilitarian, like getting socks from your grandmother. But Silka was impressed. As you know by now, she would be happy to subsist on soup and sauces alone. But until then her (now our) kitchen was missing the most valuable soup/sauce making tool: the immersion blender!

Needless to say, our (then her) kitchen now has two immersion blenders. The amazing, fantastic, life-changing immersion blender turns a chunky soup into a velvety puree in seconds - and you don't have make a mess transferring it into another container. It also allows for much better texture control when blending as compared to something like a Cuisinart. In the summer we use it a lot to make bright green basil pesto or a spicy salsa and in cooler months it's great for creamy tomato sauces, like Jake’s childhood favorite rosa sauce (recipe coming soon, don't worry). But perhaps most excitingly, it allows you to whip up thick, rich homemade mayo in the blink of an eye. See? We said "life-changing"! 

Homemade Mayonnaise

+ 1 cup of oil - we like to use half extra-virgin olive oil and half sunflower oil
+ 1 egg (room temperature)
+ 2 tablespoons of lemon juice or white wine vinegar
+ 1 tsp of dry mustard
+ 1 dash of cayenne
+ 1 dash of salt

1. In a container* pour 1/4 cup of the oil, the lemon juice, spices, and the egg. Blend it on the medium setting until it starts to emulsify (set and look like mayo). This should take just a few seconds.

2. Slowly drizzle the rest of the oil into the container as you continue mixing. It should turn into mayo. Occasionally it doesn't emulsify right- mayonnaise is just one of those mysterious things. If it doesn't work just try it again, it will only take a few seconds. Or take a look at Julia Child's recipe - we hear it's fail-proof. 

There are endless variations on your standard mayo:
Add any of the following in Step 1:
+ a few cloves of garlic makes aioli
+ 2 sprigs of mint - we like to serve it with lamb
+ a bunch of basil
+ a few strands of saffron

Add any of the following at the very end:
+ 1-2 tablespoons dijon mustard
+ 2 tablespoons buttermilk makes homemade ranch - check out a great use for homemade ranch here
+ 1 tablespoon sriracha

*Most immersion blenders come with a handy plastic container which is perfect for making the mayo in. If you have it, use it, otherwise find a tall fairly narrow container, a Pyrex measuring cup or a canning jar. You can also do it in a food processor, but we find that method trickier.

8/31/11

Tools of the Trade: Griswold Cast Iron

More than any other cooking surface, Jake loves cast iron. In fact, Silka wont even touch our cast iron pans because he's so fanatical about their treatment. No other surface gets as hot, gives as good a sear, and maintains consistent temperature. Added bonus: we love the way it looks so much we often serve food right out of the pan. Easy clean up! Our collection includes skillets, grill pans, griddles, baking molds and a beautiful dutch oven. Whether it's chops, steaks, roasts, ragus or even tart tatins- cast iron always steps up to the...plate.

Unfortunately it's very hard to find good- or affordable- cast iron. Most cast iron pots and pans produced today use an iron alloy that's not as good as pure iron and they can range in price from $30-$150. But most significantly, when you buy new cast iron it takes a long time for it to be seasoned properly. For those reasons, and the fact that we're hoarders, we're always on the look out for ‘new’ old cast iron pots and pans. 

This last weekend we were in Wellsville helping Silka’s parents get ready for the reopening of their restaurant, The Little Gem. While driving around Amish country looking for restaurant decorations we passed an old man on the side of a deserted country road selling ‘junk’ out of a tractor trailer. Of course we stopped! We pulled over and found a wealth of goodies for the restaurant, but we also scored a ton of pre-war Griswold Cast Iron pots, pans, and baking molds made in Erie, PA - only 130 miles from Wellsville. We walked away with a 10 in. skillet, a 9 in. griddle, and a kitschy corn-cob muffin pan. 50 bucks for the whole set!