Showing posts with label Fall. Show all posts

9/27/15

Recipe: Rustic Eggplant Parmesan


This is just the best time of year, isn’t it? The days are hot, the nights are cool, the sky is clear, and the light is sharp. But that’s not all! The peaches are juicy, the apples are crisp, the tomatoes are bursting, the corn is mouthwatering, and the winter squashes are starting to roll in. The Berkshires are at their most beautiful and bountiful. It’s overwhelming really — what does one do with this incredible cornucopia?

Matters are further complicated by the transition in the weather. The days are still too hot to be cooking over the stove, but the evenings are starting to be cool enough that you crave those slow roasted treats absent from plates since March. Not to mention, by this time of the year, you’re a little sick of that char-grilled flavor and you’ve consumed more sliced tomatoes then you thought was humanly possible.


We say, embrace the transition, the back and forth, the thin-line walking. Here’s how to do it: Rustic Eggplant Parmesan. This particular take on the classic Italian-American dish involves almost no prep and maybe even less time in the kitchen, but it still manages to shine with layered flavors of slow roasted tomatoes, earthy eggplant, and creamy melted cheese!

It is the best of both our worlds — hot sticky summer, and cool crisp autumn.

Rustic Eggplant Parmesan

+ 2 medium eggplant (about 2 lbs.) sliced into 1/4-inch-thick rounds
+ ¾ teaspoon kosher salt, more to taste
+ Freshly ground black pepper to taste
+ About ¾ cup extra virgin olive oil
+ 1 head of garlic (6 large cloves) minced or pressed
+ 6 medium tomatoes sliced into 1/4-inch-thick rounds
+ ½ cup finely grated Parmesan
+ 1 lb. fresh mozzarella, sliced into 1/4-inch-thick rounds
+ Handful of basil, chopped if you prefer

1. Place the eggplant slices in a colander over a bowl. Season with 1/2 teaspoon salt and let stand for 20 minutes. Drain and pat slices dry with a paper towel. Season with pepper.
2. Preheat oven to 375 degrees. In a large (9” x 13” works) baking pan, place a single layer of sliced tomatoes, then a single layer of eggplant. Sprinkle with a light coating of olive oil, garlic, and Parmesan cheese.
3. Repeat layering one more time and top with an additional single layer of tomato. Dust with salt and Parmesan.
4. Place in oven. After a half hour, remove pan from oven and cover the dish with the mozzarella, remaining Parmesan cheese, olive oil and salt.
5. Return to oven and cook for another half hour. Serve hot with basil and black pepper sprinkled on top.

Note: This recipe originally appeared on RuralIntelligence.com on September 7, 2015. 

10/9/12

Recipe: Chicken in 40 Cloves


As much as we love a good BBQ and summer produce, we’re excited to watch the leaves turn yellow and red and feel the days shorten because that means our meals are starting to change as well. Fall is really our favorite season for cooking. Braises, roasts, Brussels sprouts and squashes... we just can’t get enough. The thing is, most of those autumnal foods require a fair amount of time to prepare. And while there is nothing better than slowly braising a lam neck for 8 hours as you read by the fire, right now we just don't have the time for that.


Luckily, we have access to plenty of chicken! With just a few simple ingredients, chicken lends itself to a quick braise - all that deep, warming flavor we crave within a reasonable weeknight's cook time. For one of our first fall stews Jake brought home a chicken, a quart of stock and 4 heads of garlic while Silka picked up a bottle of dry white wine and some cookies. (Obviously, the cookies were not used in the preparation of the chicken.) In under an hour we were sitting down to a gorgeous meal, in front of a roaring fire and in a warm house filled with the scent of slowly roasted, caramelized garlic.


Chicken in 40 Cloves

+ 2 tablespoons extra virgin olive oil
+ 1 tablespoon unsalted butter
+ 1 chicken, cut into 8 pieces, at room temperature
+ Salt
+ about 40 large garlic cloves, or heads or garlic, peeled
+ 1/2 cup dry white wine
+ 1/2 cup chicken stock

1. Pat the chicken pieces dry and season liberally with salt.
2. Add oil and butter to a dutch oven over a high flame.
3. When the fats are hot but not smoking add chicken pieces, skin side down, and cook until skin turns an even, golden brown - about 3 minutes. Turn over to brown other side and when done, set pieces aside. Work in batches to cook all the meat.
4. Reduce heat to medium. Place the garlic cloves at the bottom of the skillet and sauté until garlic is lightly browned on all sides - about 10 minutes.
5. Add the chicken on top of the garlic then pour in the wine and stock.
6. Cover and continue cooking until juices run clear when a thigh is pricked - 10 to 15 minutes more.
7. Take cover off and place under the broiler for 5 minutes to re-crisp skin of the chicken. Serve over rice or potatoes.

9/21/12

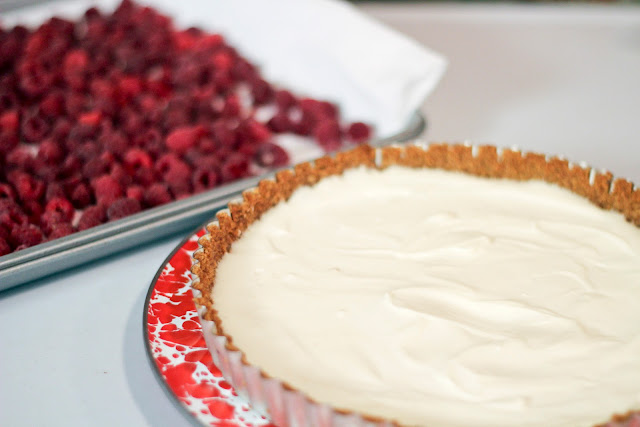
Recipe: Raspberry Sour Cream Tart

We are loving our first September together in New Marlborough – perfect weather, the best produce and the late afternoon light?! Amazing! In fact, we fell so in love with September in the Berkshires that we’ve been inspired to get married here, in our backyard, next fall!! 

Not surprisingly, many of our preliminary wedding-planning conversations revolve around food. Jake works with the most amazing team of caterers at Fire Roasted Catering, The Meat Market’s sister company, so that decision was easy to make. But there’s still the cake. We definitely want to incorporate fruit and since we’re drowning in raspberries right now (in the best way!) we knew they’d be a great, seasonal fruit to celebrate.

 
So why do we have so many raspberries? Decades ago Jake’s grandmother planted two raspberry patches - a summer patch and an autumn patch. As the weather starts to cool and the days get shorter, we feel so lucky to have this incredibly bountiful second harvest! On any given day there is at least a quart of newly ripe, sweet rubies to be plucked.

Ok, back to the wedding! We’ve started to play around with some raspberry dessert ideas, preferably ones that are red and white to match our décor (more on that later!). Through a fruitful Google session, Silka found this beautiful and bright recipe - and while it may not be suitable for our wedding cake, we are so happy to have stumbled upon it! 


Raspberry Sour Cream Tart
Bon Appetit via Epicurious.com

For crust
+ 8 whole graham crackers, coarsely broken
+ 1/4 cup (packed) golden brown sugar
+ 1/4 cup (1/2 stick) unsalted butter, melted

For filling and topping

+ 6 ounces cream cheese, room temperature
+ 1/3 cup sugar
+ 1/2 cup sour cream
+ 2 teaspoons fresh lemon juice
+ 1/2 teaspoon vanilla extract
+ 2 1/2-pint baskets raspberries
+ 1/4 cup seedless raspberry jam

To make crust:
Preheat oven to 375°F. Grind crackers and sugar in processor until coarse crumbs form. Add butter and process until crumbs are evenly moistened. Press crumb mixture firmly onto bottom and up sides of 9-inch-diameter tart pan with removable bottom. Bake until crust is firm to touch, about 8 minutes. Cool crust on rack.

Make filling and topping:
Using electric mixer, beat cream cheese and sugar in medium bowl until smooth. Beat in sour cream, lemon juice and vanilla. Spread filling in cooled crust. Chill until firm, at least 4 hours. (Can be made 1 day ahead. Cover; keep chilled.)

Arrange berries over filling. Whisk jam in small bowl to loose consistency. Drizzle over berries. Serve immediately or chill up to 3 hours.

3/16/12

Recipe: Piemontese Short Ribs

When we asked Harmon of Maple Avenue Farms how he likes to eat his own Sun Fed Beef, he said a rare hamburger, just like Grazin Angus' Chip did. The reasons were similar - it's cheap, easy and a great way to showcase quality grass-fed flavor. Alex, on the other hand, said short ribs. We were pretty pumped about this answer. Not that we don't love a good burger (and boy, do we!) but we hadn’t posted our short rib recipe yet and Jake had been looking for an excuse.


Short ribs are a great cut, especially in the colder months. Like most cuts from the shoulder (e.g. brisket, chuck) it needs a long, slow braise. But unlike those other cuts, you cook it on the bone, which deepens the flavor of the meat. Short ribs are also great because they're fairly cheap and always a crowd-pleaser which makes them an awesome dinner party food! There are tons of delicious ways to cook them, but Jake like to refer to the northern Italian foothills of Piemonte for his version (doesn't he always?), using the deep flavors of the region's wine as an earthy base.

We were heading over to Christian and Lauren's apartment for a night of games and booze so we thought we'd bring our short rib contribution. For the low-key evening we didn't make any sides but in case you do, this dish is perfect over some creamy polenta. 


Piemontese Short Ribs

+ 3 lbs of Short Ribs
+ 4 tbsp of olive oil
+ 1 cup of flour
+ ½ cup salt
+ 1 lb of carrots, cut into discs
+ 2 large onions, diced
+ 3 tbsp of tomato paste
+ 1 bottle of Piemonte wine (e.g. Dolcetta D’alba, Barbera)
+ 2 cups of stock
+ 1 bay leaf

1. Preheat your oven to 300 degrees. Mix the flour and salt on a plate, and coat the short ribs in the mixture.
2. Heat the oil in a large heavy pot or dutch oven. When the oil starts to shimmer, brown the ribs in batches so as not to over crowd the pot. Set aside the browned ribs.
3. Put the carrots and onions in the pot, adding oil if needed.
4. When the carrots and onions start to brown, make some room in the center of the pot and add the tomato paste. Let that caramelize for a few minutes.
5. Stir the tomato paste into the vegetables then pour in wine, until the bottle is empty or the wine reaches the top of the ribs. Let the wine reduce by half.
6. Add enough stock so that the liquid just covers the ribs, and add the bay leaf. Bring to a boil and cover.
7. Put in the oven for 3 hours, or until meat is falling off bone.

Serves 4-5

1/27/12

Recipe: Righteous Lamb with Carrots

The other night we invited our friends Kelly (The BLager) and Matt over for dinner. We were excited to have them because A) we hadn’t seen them in way too long and B) we wanted to pitch a collaboration to Kelly - more to come on that but just know that you should be very excited and thirsty! Jake has been developing a recipe for lamb shoulder braised in Sixpoint Righteous Ale and we knew if we could get it right, the dish would wow our visiting lager connoisseurs.

Righteous Ale is one of Jake’s favorite beers and the perfect braising liquid to bring out both the sweet and spicy notes of Arcadian Pastures lamb. We're always trying to find ways to bring some extra color into our winter meals, so we thought we'd fold in some carrots from Windfall as well. After picking up our ingredients Jake got back in the kitchen, cracked open a can of Six Point goodness and starting sifting through the spice cupboard. As soon as he sniffed the coriander, he knew he'd found the third and final component he'd been looking for.

The dish came out really well and, most importantly, was approved of by our official brewmaster. Stay tuned for more news on the beer front, and in the meantime we hope you enjoy this hearty winter stew!

Righteous Lamb with Carrots

+ 3 lbs lamb shoulder, cubed
+ flour
+ 3 lbs of carrots, 1 lb chopped and 2 lbs cut into ½ in by 3 inch sticks
+ 1 onion, chopped
+ 1 tbsp of whole coriander
+ 16 oz of Sixpoint Righteous Ale
+ 1 ½ cups of chicken stock
+ olive oil
+ salt
+ pepper

1. Preheat oven to 350 degrees
2. With a clean towel dry off the pieces of lamb. On a clean plate pour about ¾ cup of flour and a heavy dose of salt. Mix with a fork and coat the cubed lamb in it.
3. In a heavy pot or dutch oven heat 3 tablespoons of olive oil over high heat. In small batches, brown the lamb pieces, setting aside when done. Add more oil as needed.
4. After browning the meat, turn heat down to medium-high. Throw in the coriander, and when the seeds start to toast and release their aroma, add onions and chopped carrots. Cook until vegetables begin to soften. Add lamb back to the pan, along with the beer and stock.
5. Bring to a boil, cover and put in oven for 2 hours.
6. After two hours, lay the carrot sticks on top of the stew, and put back in the oven for another 30 min. You can also sprinkle with some fresh herbs. (Sorry, we didn't get a photo of this, mostly due to urgent hunger!)
7. Take out of the oven and serve.

Serves 4 with leftovers

1/18/12

Recipe: Farro "Risotto"

We've been excited and intrigued by the arrival of a new pastured beef stand at the Wednesday Market - Stony Mountain Ranch! Stony Mountain is a small ranch raising Piedmontese beef in Schuylkill County, PA. A heritage breed cow that comes from Northern Italy, Piedmontese beef is marked by being extremely lean and having a unique iron-y flavor, surprisingly bright and almost citrusy. Sounds great to us! We decided cook some up for Silka’s doctor-prescribed weekly steak (pretty great prescription, right?!) but weren't in the mood for our standard side of boiled potatoes.

Taking our cues from the beef, we decided to make a hearty Italian-style dish. So, as is so often the case, we walked over to Cayuga Pure Organics for some help. We quickly grabbed a bag of farro and set our hearts on a simple "risotto". After picking up some gorgeous carrots from from Windfall we headed home to experiment. The result was rich, warming and nutty! We're so glad to have added it to our repertoire!

Winter Farro “Risotto”

+ 1 cup farro
+ 1 lb carrots and parsnips, cut in to rounds
+ 4 cloves of garlic, sliced thinly
+ 6 cups of water (or stock)
+ 3 tbsp olive oil
+ 1 tbsp fresh oregano
+ ½ cup Parmesan, grated (plus more for serving)

1. Soak farro in water for one hour. Bring water (or stock) to a boil then add the soaked farro, turn to heat to low and cover. Cook for 45 minutes.
2. While farro is cooking, heat up olive oil in a medium sized pan, on medium-high heat. Throw in garlic. When garlic starts to brown, add in carrots and parsnips. Saute until the carrots start to get golden and soft.
3. Add cooked farro into the pan with carrots and add oregano and cheese. Cook, stirring constantly, for a few more minutes, until all the cheese has melted. Serve.

Serves 4

1/13/12

Recipe: Mushroom Cream Sauce with Bacon

When you make something amazingly pure and delicious like homemade gnocchi you want to complement your efforts with a simple sauce. Gnocchi takes especially well to light cream sauces (and who doesn't like a light cream sauce?) so we jumped to an easy bacon and cream sauce that has become a trusty standby. This magic sauce takes almost no time or elbow grease to make, costs basically nothing and - if you're like us - you always have bacon, cream, and stock in the fridge, so it requires no shopping!   

Most of the time we add peas, but because no one sells frozen vegetables at the Union Square Market (why IS this?!) we decided to go with seasonal mushrooms. The Mitake and Shitake shrooms were looking and smelling particularly good this week, so we picked up about a half pound of each, figuring their earthy aroma would suit the potato-y clouds perfectly. And boy did it! We hope you enjoy as much as we do! 

Mushroom Cream Sauce with Bacon

+ 1 lb of mushrooms, cut in to meaty slices
+ 1 lb of bacon ends, cut into lardon, or thickly sliced bacon.
+ ¼ cup of cream
+ ½ cup stock
+ 1 sprig of fresh rosemary, roughly chopped

1. In a heavy skillet, on high heat, begin to brown the bacon. When the bacon starts to crisp up, add the mushrooms, and turn down to medium-high.
2. When the mushrooms start to brown and release their aroma (about 5 minutes) turn the heat further down to medium and add rosemary. After a few minutes pour in the stock and stir to release the browning bits off the pan. Let reduce for a few minutes.
3. Pour in the cream. Simmer for another couple minutes then mix in a pound of gnocchi or pasta.

12/23/11

Recipe: Ham Bone Soup

Post-Christmakkah we were left with lots of applesauce and latkes, and a bit of ham. We ate the latkes for probably too many breakfasts, lunches, and dinners and managed to finish most of the ham. With the applesauce we made a cake (to be posted later) and are currently canning the rest as holiday gifts. So basically, we were left with a ham bone. 

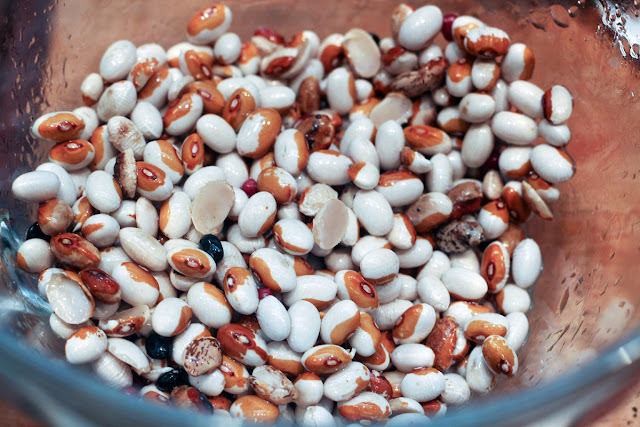
Jake, being the thrifty butcher that he is, had been fantasizing about what to do with that ham bone since the day he smoked it. Meanwhile, we had been excitedly reading about Cayuga Organics' new harvest of heirloom yellow-eyed beans. A classic bean and ham bone soup seemed like the perfect opportunity for them.


We went to the market to pick up the beans, a few carrots and onions, and a bunch of kale. Not wanting to put in any more effort than was absolutely necessary, we didn’t bother letting the beans soak over night. Instead we simmered them for 6 hours with the veggies (sauteed in ham fat, of course!), some water and the ham bone. The stock was so rich and creamy,  and the aroma so intense, it was almost impossible to believe that it could have come from just some water, a bone and beans!

Ham-Bone Soup

+ 2 tablespoons of ham fat, olive oil or butter
+ 1 lb carrots, chopped
+ 1 medium onion, sliced
+ 1 ham bone
+ 1 lb beans
+ 1 lb of kale
+ 2 quarts of water
+ Salt and pepper to taste

1. Saute the onions and carrots in fat in a large heavy-bottomed pot.
2. As they begin to get soft and translucent add the water, beans, and ham-bone. Bring to a boil, then turn down to a simmer.
3. Simmer for 5 ½ hrs, stirring occasionally. (If you have left over ham from the bone, throw some chunks in after about 3 hours.)
4. Add the kale and simmer for another 20 minutes. Remove the bone and serve.

Serves 8

12/11/11

Recipe: Gramercy Tavern's Gingerbread

We LOVE Smitten Kitchen. In fact, it was probably the first food blog that Silka saw and thought: Wow, I might actually want to do that. We've made plenty from Deb's archives and almost everything has turned out perfectly. Her favorite Chicken and Dumplings changed our lives. But for some reason Silka has had some trouble with a few of her baking recipes. This isn't to say that they are wrong or bad, because they come from reputable food writers and chefs, plenty of people reference her religiously and she's fabulous enough to get a cookbook deal. So we'll blame it on our own oven issues or sub-par ingredients and keep trying because all those recipes look soooo good.

As you already know if you follow us here or here, we're having a big Christmakkah Dinner this weekend. Silka has her heart set on making Gramercy Tavern's Gingerbread as posted on Smitten Kitchen because, come on, who doesn't love a cake made with molasses and Guinness. But rather than leave it up to her historically awful luck we decided to try it out before the party - a novel idea, we know.

And now, almost a full week before our party we can breathe a sigh of relief because it worked! We lost a bit off the top because of an under buttered pan, but after sprinkling some confectioner's sugar you barely notice. And, anyway, who cares because it's SOOO good! The best part? We can make it ahead of time and all the deep flavors will just get better and deeper and the chewy, crusty edges will just get chewier and crustier. This cake is the real deal so get ready Christmakkah guests! And if you're not coming to the dinner, take it from us and make this cake! It will work - we promise!


Gramercy Tavern's Gingerbread

+ 1 cup oatmeal stout or Guinness Stout
+ 1 cup dark molasses (not blackstrap)
+ 1/2 teaspoon baking soda
+ 2 cups all-purpose flour
+ 1 1/2 teaspoons baking powder
+ 2 tablespoons ground ginger
+ 1 teaspoon ground cinnamon
+ 1/4 teaspoon ground cloves
+ 1/4 teaspoon freshly grated nutmeg
+ Pinch of ground cardamom
+ 3 large eggs
+ 1 cup packed dark brown sugar
+ 1 cup granulated sugar
+ 3/4 cup vegetable oil
+ Confectioners sugar for dusting

1. Preheat oven to 350°F. Generously butter bundt pan and dust with flour, knocking out excess. (Seriously. Butter a LOT. We thought we'd buttered more than we could possibly butter, and still lost almost all of the decorative bundt shape from the top.)
2. Bring stout and molasses to a boil in a large saucepan and remove from heat. Whisk in baking soda, then cool to room temperature.
3. Sift together flour, baking powder, and spices in a large bowl. Whisk together eggs and sugars. Whisk in oil, then molasses mixture. Add to flour mixture and whisk until just combined.
4. Pour batter into bundt pan and rap pan sharply on counter to eliminate air bubbles. Bake in middle of oven until a tester comes out with just a few moist crumbs adhering, about 50 minutes. Cool cake in pan on a rack 5 minutes. Turn out onto rack and cool completely.
5. Serve cake dusted with confectioners sugar, with whipped cream or ice cream.

12/2/11

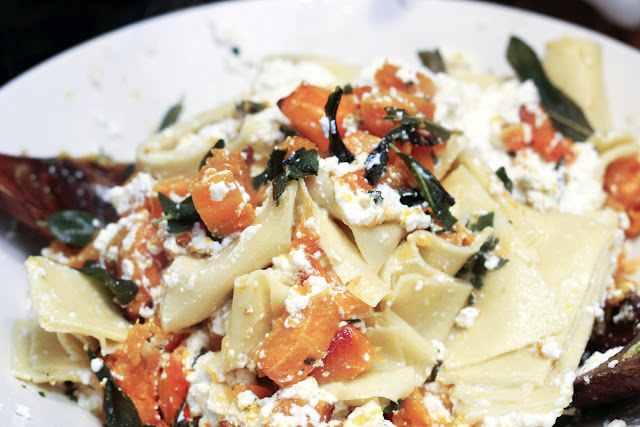
Recipe: Pappardelle with Ricotta & Squash

When combined, certain foods become a holy and amazing force. Peanuts and chocolate... cheese, ham, and mayo... brussels sprouts, bacon, and apples... ricotta, winter squash, and sage... The latter, Silka has been jonesing for pretty consistently over the last few weeks. First we tried to satiate the craving with a pizza. We bought dough at Eataly, picked up some delicata, riccota and sage from the market and put it all together. But it just wasnt enough. The ingredients were overwhelmed by the dough, the delicata wasn't quite right and the piney flavor of the sage wasn’t pronounced enough. 

Never to give up on a culinary dream, we decided to try again but this time stripping it down to the essentials. After realizing that we needed something simple like pasta as a base, we got more fresh ricotta, sage, and a butternut squash. We roasted the squash in large chunks with butter to bring out it's full umami and we fried the sage, filling the kitchen a woodsy smell. When we mixed it all together - the ricotta just melting, the squash breaking down with the crunchy sage, the al dente pasta's water thickening everything up a little - we knew we'd finally gotten it right!

Pappardelle with Ricotta & Squash 

+ ¾ lbs fresh pappardelle
+ 1 lb fresh ricotta
+ 1 medium butternut squash, cut into 1-inch chunks
+ 2 tablespoons butter
+ 1 large bunch of sage (or 1 loose cup)
+ vegetable oil
+ salt and pepper

1. In a large roasting pan, spread the squash out in one layer. Dot with butter, sprinkle with salt, and roast at 400 degrees for about 1 hour.
2. In an unheated heavy duty pan, pour the vegetable oil so it is about ¼ inch deep. Place pan on high heat and let heat up for a minute or so. Put about half of the sage in the oil and let sage fry for about a minute. Remove the sage and put it on a paper towel to drain. Repeat with remaining sage.
3. Boil salted water for the pasta in a large pot and cook pasta to the package's directions. When cooked, drain the pasta and put in serving bowl. Toss with the fried sage, roasted squash and ricotta. Salt and pepper to taste.