Showing posts with label All Seasons. Show all posts

12/14/12

Recipe: Sinful Bread Pudding

In case you haven’t noticed, we love dessert. Whether it’s a simple scoop of Maple Valley Ice Cream or a decadent chocolate molten soufflé cake, we want a bite and then some. And while we are equal-opportunity dessert eaters, one our favorite forms of post-dinner sweetness is pudding. Rice, Indian, tapioca, banana - you name it, we’ll eat it.

Did you get the Saveur magazine in which Gabriella Gershenson, a Berkshire food devotee, wrote about Berkshire Mountain Bakery? In addition to waxing poetic about owner Richard Bourdon’s unique baking process, she asserts that their chocolate ciabatta is perfectly fit for bread pudding. Well, we had to try it – and right away. We jumped in the car and headed to the Co-Op, only to discover that they were sold out! Not to be deterred, we grabbed a discounted day-old BMB peasant loaf, some chocolate chips and headed home to improvise.


Looking through our cookbooks, we flipped across so many delicious sounding variations on the classic recipe. Chocolate bread pudding, brown-butter bread pudding, bourbon bread pudding... being the gluttons that we are, we decided that there was no harm in having it all once in a while. So after a few preparatory shots of Berkshire Mountain Distillers rum, Silka got down to the business of making the most sinful bread pudding possible.


Sinful Bread Pudding
Adapted from How to Cook Everything by Mark Bittman

+ 6 cups baguette or ciabatta, cut or torn into 1-inch chunks
+ 4 tablespoons butter, plus more for greasing
+ 2 cups half-and-half
+ 3/4 cup maple syrup
+ 1/2 teaspoon cinnamon
+ a pinch of salt
+ 3 tablespoons rum or whiskey
+ 4 eggs
+ 1/2 cup semisweet chocolate chips

1. Preheat oven to 350 degrees. Over low heat in a small saucepan butter, half and half, maple syrup, cinnamon, salt and liquor until the butter just melts. In the meantime, butter an 8x8 baking dish or a casserole that fits 1.5 quarts.
2. Put bread pieces into casserole and pour the slightly cooled milk mixture on top. Let sit for a few minutes, submerging any pieces of bread that rise to the top.
3. Beat the eggs lightly, and pour over the bread mixture along with the chocolate chips. Stir gently, being careful not to tear up too many of the bread pieces.
4. Bake for 45 minutes. The center will be a little wobbly still, but it will set as it cools. Serve warm.

11/24/12

Recipe: Brisket Chili

We have been toying around with the idea of the perfect chili for a while now. Of course, depending on your location and heritage, there are a thousand different variations on a classic. Beans or no beans? Pork or beef? Do you use a whole muscle or ground meat? What cut? And then, what kind of chiles do you use? Researching a "classic" chili doesn't answer many questions as much as it just asks more. And so we stewed (get it!?) on these questions happily, experimenting and tasting along the way. It's a hard job, but someone has to do it.

At long last, we decided: beans on the side; beef; whole muscle; brisket, ancho and chipotle chilies. And since the only thing more American than apple pie is chili, we debuted our well-tested recipe on election day for a group of hungry and anxious friends.

 
As he was closing up shop Monday night, Jake grabbed a gorgeous and fatty Whippoorwill brisket, along with some Cayuga black turtle beans, Wild Hive cornmeal, two quarts of beef stock, and a few ancho and chipotle chili peppers. On Tuesday afternoon, he put the brisket in the oven, the beans on the stove top, and let everything simmer away. Meanwhile, Silka made some skillet cornbread to soak up the smokey, spicy sauce.

In the end we couldn't have been happier with the results... ALL of them.
 

Brisket Chili

+ 4 tablespoons of lard or bacon drippings
+ 1 whole beef brisket, with lots of fat (roughly 6 lbs)
+ Sea salt
+ 2 medium onions, chopped
+ 4 cloves garlic, crushed
+ 3 teaspoons sweet smoked paprika
+ 3 teaspoons cumin
+ 4 dried chipotle chillies
+ 4 dried ancho chillies
+ ¼ cup brown sugar
+ 2 tablespoons tomato paste
+ 2 cans of plum tomatoes
+ 2 quarts beef stock
 
To prepare:
Bring the brisket out of the fridge at least one hour prior to cooking so it comes to room temperature. At the same time, soak the dried chilies in hot water for about ½ hour.

1. Pat the brisket dry and coat with salt. (We used smoked salt - if you can find it, we recommend it!). Preheat the oven to 250.
2. Heat the lard in a large dutch oven over high heat.
3. When the lard starts to smoke, brown the brisket for 3 minutes on each side. Set brisket aside.
4. Add the onion and garlic to the pan, cooking until softened.
5. Add the paprika, cumin, sugar, tomato paste and chillies, cooking for an additional minute.
5. Return the brisket to the pan along with tomatoes and stock. Bring to a boil and cover.
6. Place in the oven for 6 hours, removing the lid for the final 1 ½ hours of cooking.
7. After you have removed the the brisket from the oven, take the brisket out of its sauce, place in a deep dish and let rest.
8. With an immersion blender, or in a food processor or blender, puree the sauce remaining in the dutch over and reduce for about ½ hour. 
9. Serve brisket with the chili sauce poured on top, beans and cornbread on the side. 

Serves 8-12.

9/13/12

Recipe: Santa Maria Tri-Tip

Jake has been talking about bringing a tri-tip steak home to grill all summer - easier said than done. Each steer only has two tri-tips and it's an elusive cut in the north-east, so they generally don't last long in the case. Like other one- or two-to-an-animal cuts (skirt, flank, and hanger) Jake had resigned himself to going yet another summer without one. But last weekend The Meat Market had a few too many of this much-coveted cut and Jake was finally able to sneak a couple home!

The tri-tip is a incredibly flavorful and unique cut, but because it's a muscle that starts in one primal (the loin) and ends in the other (the round) it is usually forfeited at the hands of industrial meat processing. It is also a part of the sirloin subprimal, sometimes referred to as the bottom sirloin. As a result of this cross-sectioning of cuts, the tri-tip cooks like a roast as much as it does a steak, giving you a ton of different preparation options. We think it's the best of three pretty awesome worlds; the texture of a flank, the tenderness of a sirloin, and the flavor of the top round. 

Made popular in central California at the turn of the 20th century, the tri-tip is most often cooked in the Santa Maria style - coated in a dry rub and grilled. As you well know, we generally like to keep our steaks as simple as possible, but the flavor of the tri-tip is bold so we knew it would stand up to a heavy rub. We looked around for various recipes but in the end, surprised by how few there were, we put our own mix together. While the spices were setting in, Silka threw together a minimal salsa verde with a pile of tomatillos from our garden. It may have been one of our last nights of grilling this season, and we couldn't have asked for a better send-off!

Santa Maria Tri-Tip

+ 2 tablespoons coarse sea salt
+ 2 tablespoons freshly ground black pepper
+ 3 tablespoons dark brown sugar
+ 1 tablespoon sweet paprika
+ 1 tablespoon chipotle-chili powder
+ 2 teaspoons garlic powder
+ 2 teaspoons onion powder
+ 1 teaspoon ground cumin
+ 2 trimmed tri-tips (1 ½ lbs each)

1. Mix all of the spices together thoroughly.
2. Rub the spice mix all over the steaks. 
3. Let the steaks stand for two hours, reapply any rub left over.
4. Meanwhile set up your grill so that there is a very hot side and a side for indirect heat.
5. On the hot side of the grill sear the steaks on each side for 3 mintues.
6. Move the steaks to indirect heat and cover the grill. Cook for another 15-20 minutes, or until the steak reaches 120 f.
7. Let stand for 10 minutes, slice and serve!

Serves 4-6 people

6/13/12

Recipe: Grilled Flanken

 
You may have noticed that we often gravitate toward affordable and overlooked cuts of meat. And why not? Rather than fight the crowds for grill-ready rib eyes, flank steaks and London broils during the summer months, we skip the line and go for flanken. For Jewish grandmothers and Korean BBQ lovers this cut of beef is nothing new, but for most American shoppers it's an unusual looking piece of meat. Quite simply, flanken is short ribs sliced thinly across the ribs rather than along the bones. And just like short ribs, flanken are intensely marbled with fat and have an amazing beefy flavor - even on the leanest grass-fed animal.


The other morning Morgan Hartman, owner of Black Queen Angus, delivered the most beautifully marbled beef to the Meat Market, and as soon as Jake started to break it down he knew it would make the perfect flanken. So he zipped off 3 pounds of 1/4 inch thick strips on the band-saw and grabbed a bottle of Fire Cider - our new secret ingredient - some soy sauce and a little garlic for a marinade. The meat hung out in the marinade for the rest of day and when Jake got home, we threw it on a low grill with some asparagus. How was it, you ask? When a fight almost breaks out over the last slice, you know you've put together a great meal.

* While we don’t often use marinade - preferring the simple flavors of pastured meat - flanken is the ideal cut for it. The marinade (especially with something acidic like Fire Cider) helps to break down the naturally chewy quality of the cut without getting in the way of the chuck flavor. 
 

Grilled Flanken

+ 3 lbs of ¼” thick flanken

+ 1 cup of Fire Cider
+ ½ cup of soy sauce
+ 4 cloves of garlic, minced

1. Mix the Fire Cider, soy sauce, and garlic together in a bowl.

2. Set the flanken in a dish, deep enough the cover them. Pour the marinade over and let sit for at least 6 hours, no more than overnight.
3. Start the grill up and over low heat grill the flanken for about 7 minutes per side, or until they take on a deep brown caramelized color. Serve!

5/30/12

Recipe: Buttermilk French Toast & Rubarb Compote

 
As we've definitely mentioned before, we're drowning in a sea of fresh eggs - along with all the other backyard chicken owners out there. But, of course, we're not complaining! There are a seemingly infinite number of recipes that use eggs by the coop-full, and we're having a blast experimenting.


Lucky for us, we also have a glut of fantastic local bakeries in the area. One of our favorites, and oldest, is the Daily Bread Bakery. They make a ton of fantastic things - black bottom cupcakes, homemade oreos, granola... not to mention, one of the best basic chocolate cakes ever. 

But our current obsession is their classic challah bread. This buttery challah, toasted with a spoonful of jam, makes an amazing breakfast all on its own. But add a few bright eggs and some tangy buttermilk, and you've got the fixin's for some kick-ass french toast! So the other morning we took out a loaf, cut a few thick slices, cracked some eggs, and started cooking. Because we also have too many rhubarb stalks (detecting a theme here?) we made a quick compote to spoon on top along with our favorite Old Field Farm Syrup. Sweet, simple, and delicious - and we used up four eggs!


Buttermilk French Toast

+ 1 1/2 cups well-shaken buttermilk
+ 4 large eggs
+ 3 tablespoons sugar
+ 1/4 teaspoon salt
+ 12 (1/2-inch-thick) slices challah (from a 1-pound loaf; not end slices) 
+ 4 1/2 tablespoons unsalted butter, divided 

1. Preheat oven to 200°F. 
2. Whisk together buttermilk, eggs, sugar, and salt in a bowl. Pour into a large 4-sided sheet pan, then add bread in 1 layer and soak, turning occasionally, until bread has absorbed all liquid but is not falling apart, about 20 minutes.
3. Heat 1 1/2 tablespoon butter in a 12-inch skillet over medium-high heat until foam subsides. Transfer 4 bread slices with a slotted spatula to skillet and cook, turning once, until slightly puffed and golden brown, about 3 minutes total. 
4. Transfer to a large shallow baking pan and keep warm in oven. Cook remaining bread in 2 batches, adding 1 1/2 tablespoon butter between batches.  

Rhubarb Compote

+ 4 cups 1/2-inch pieces fresh rhubarb
+ 1 1/2 cups sugar
+ 2 tablespoons fresh lemon juice

1. Simmer the ingredients in a small saucepan until the rhubarb is soft, about 15 minutes.

5/13/12

Recipe: Pork Tacos

Around this time of year we generally like to go on a short, relaxing, south-bound escape. After a long winter cooped up in the sludgey city, it's the perfect time to jump on a plane headed for sandier pastures. Last year's destination was Isla Mujeres, a tiny island just off the coast of Cancun. It was the perfect getaway; a long weekend packed with beach reading, bike riding, tequila drinking and, of course, taco eating. It's been over a year now and those tacos - served on paper plates at a colorful municipal food court, simple and fresh corn tortillas, topped with crispy pork shoulder, raw onions and radishes, paired with a bright, cold beer - have had us swooning ever since.

Unfortunately, this year we won't be going on a trip. We've both just started new jobs, and are knee-deep in exciting projects, but those tacos have been on our minds. So this weekend when radishes finally popped up at the market, we knew exactly what to do with them. Jake brought home the pork shoulder cut in to pinky-sized strips and Silka picked up fresh veggies, some local creme fraiche, and Hot Bread Kitchen corn tortillas. A quick pickle of radishes and onions, some fried pork and a Sixpoint later, we satisfied our craving. So maybe we weren't enjoying a breezy island evening over crystal clear waters, but with good food, good company, and good things to come... who needs vacation?!

Quick Carnitas

+ 2 lbs of Pork Shoulder cut into pinky-sized strips
+ 2 tbsp of lard
+ salt, pepper, and cayenne to taste

1. Put the lard in a large, heavy pan and and turn the heat to high. Season the pork to taste.
2. When the lard starts smoking, throw in half of the pork. Stir occasionally, until the pork takes on a  deep brown color and gets nice and crispy.
3. Remove the cooked pork, put on a serving dish and repeat.

Serve on warm tortillas with radishes, onions, creme fraiche and chives.

Quick-Pickled Radishes and Onions

+ 4 radishes, thinly sliced
+ 1/2 white onion, thinly sliced
+ 4 tablespoons apple cider vinegar
+ 1 tablespoon sugar

1. Mix ingredients together and cover. Chill for 1 hour, stirring occasionally.

Serves 4

4/24/12

Recipe: Venison Western Steaks

If you follow us on Facebook, you may have heard that Jake is the new butcher at the Meat Market in Great Barrington - and having a blast! The shop runs on hard work from a great team of passionate people and he's already had the opportunity to experiment with lots of different cuts, techniques... and animals!

The other day, the shop got in a farm-raised venison and Jake was thrilled for the chance to break down something new! And of course we had to taste it! That night he brought some home in the form of a Western steak - one of the cuts we're most excited about cooking this summer. From the the bottom round, it's a muscle usually reserved for grind, lean stew or roast beef. But because it is so lean and has so much flavor it takes particularly well to grilling.

Now we can confidently say that as amazing as venison looks, it tastes even better! With a strong grassy flavor like beef but much lighter, it's actually quite similar to elk! (P.S. One of the best meats out there!) The new game reminded us so much of our perfect Scandinavian summer, so we served roasted beets and egg noodles in caraway butter on the side to honor it further. It was perfect for the first grill of the season!

Grilled Western Steak

+ 1 1-inch thick western steak (cut from the bottom round)
+ salt and pepper to taste
+ olive oil

1. Let grill get to high heat.
2. Pat steak dry and salt, drizzling a little olive oil on it. Put on grill for 3 minutes.
3. Drizzle a little more oil on the steak and flip. Cook for 3 more minutes.
4. Remove from heat and let rest for 5 minutes. Slice and serve!

4/10/12

Recipe: Matzoh Ball Soup

Perhaps not surprisingly, Passover is one of Jake’s all-time favorite holidays because it's a night on which we use food to tell a story about justice. And this year's seder was particularly momentous because it marked our first full week living in New Marlborough, MA. So we invited the usual suspects to join us for a long night of singing, eating, drinking, and telling stories. 

Our (semi-) traditional seder dinner consists of the standard matzoh, hard boiled eggs, parsley, charoset, horseradish, and matzoh ball soup - but instead of brisket, we like to serve a leg of lamb. It just seems more fitting to Spring - and especially on this holiday in which the paschal lamb looms so large. We were really excited to get the leg at the awesome The Meat Market in Great Barrington - Jake's new place of employment! The whole meal came together perfectly!

Recently, in our hasty head-first dive into Spring, we've posted a lot of lamb so we thought we'd take this opportunity to share Jake's family Matzoh Ball Soup recipe. The recipe is borrowed from a A Little Jewish Cookbook, literally a pocket-sized book that Jake bought for his mom on a childhood trip to Ellis Island. It makes the lightest, most warming matzoh balls we've ever had!  But of course, we're a little biased.

Matzoh Ball Soup 

+ 2 tbsp chopped parsley, plus more for garnish
+ ½ tsp ground ginger
+ 6 tbsp of freshly melted schmaltz (rendered chicken fat) or olive oil
+ salt and pepper to taste
+ ¾ cup of sparkling water
+ 1 ½ cup of matzoh meal
+ 6 eggs, beaten
+ 2 quarts of chicken stock
+ 4 large carrots sliced into ¼” thick wheels

1. Stir parsley, ginger, salt, pepper into schmaltz.
2. Add eggs and sparkling water and beat to blend. Stir in matzoh meal.
3. Refrigerate for one hour. In the meantime, bring the chicken stock to a boil.
4. Wet hands and form chilled matzoh mixture into golf ball sized balls. Drop into boiling chicken stock, along with sliced carrots.
5. Reduce heat, cover, and simmer for 20 minutes or until balls float to top. Sprinkle with remaining parsley and serve.

3/20/12

Recipe: Shoo's Scrambled Eggs

Like PB+J's, chocolate chip cookies and chicken noodle soup, most people like their scrambled eggs the way they like them. Or, in Jake's case, the way their mother makes them. Luckily for Silka, Jake's mom makes some killer scrambled eggs! (Warning: If you like your eggs dry, this post is not for you!) Susan - or "Shoo," as we call her - starts her scrambled eggs by adding lots of great dairy (cream cheese!!) then cooks them suuuuuper slowly, resulting in the most creamy, soft, moist pile of sunny yellow eggs you'll probably ever taste.

What makes these blissful eggs even better is that lately they've been coming from our very own chickens! Our little flock is free to spend most of it's days wondering around the yard scratching for good grub, and the happy result of this free-ranging lifestyle is a daily collection of eggs with intensely saffron-yellow yolks. This past weekend we scrambled some up along with a handful of bacon from our own pig and a hash of the previous night's roasted roots. It was a humble Sunday Brunch, but it couldn't have been more heavenly!

Shoo’s Scrambled Eggs

+ 6 eggs, ideally fresh and/or free-range
+ ⅓ cup cream
+ 2 oz cream cheese broken into small (about 1/2 inch square) chunks
+ salt and pepper to taste
+ 2 tbsp butter

1. Beat the eggs lightly with the cream. Stir in the cream cheese, salt, and pepper.
2. Melt butter in a thick sauce pan. When butter has melted pour in the eggs.
3. Cook at lowest heat, stirring occasionally.
4. Serve immediately.

Serves 3

3/12/12

Sunday Dinner: Garlicky Leg of Lamb with Polenta

As you’ve probably noticed, we’re major lamb lovers. So it's no coincidence that one of our all-time favorite stands at the Union Square Greenmarket is Catskill Merino. If you've never had the opportunity to stop by this lamb and wool haven, you absolutely should make the effort. The wide stall is lined with hundreds of skeins of beautifully hand-dyed wool in the most amazing natural colors, with luscious lamb skins piled high in the center. And of course, the front is jam-packed with cooler after cooler of delicious lamb cuts, sausages and jerky!

This weekend while walking past the stand, we peered into the coolers and were struck by a leg of lamb. While that cut is a little fancy for us – and even though it was boneless, which we don’t usually go for - it seemed to be just sitting there, waiting for us. And who were we to resist?? We quickly grabbed the leg, along with 5 heads of garlic (another Catskill Merino specialty) and happily marched home.

As is often our philosophy, with such a beautiful piece of meat it’s nice to keep it simple. And as we often do, we went the Tuscan route for inspiration. Garlic, rosemary and olive oil on the lamb, along with a hearty scoop of creamy polenta from Cayuga Pure Organics and a simple arugula salad made for a fantastic Sunday dinner!

Garlicky Leg of Lamb

+ 1 4-lbs leg of lamb
+ 2 small heads of garlic minced (about 3-4 tbsp)
+ 3 tbsp of diced rosemary
+ 1 tbsp plus 1 tsp of Extra Virgin Olive Oil
+ 2 tbsp coarse sea salt

1. Let lamb come to room temperature and preheat oven to 350 degrees.
2. Mix the garlic, salt, olive oil, and rosemary together to make a coarse paste.
3. Pat the lamb dry and cover with paste.
4. Place a heavy skillet over high-heat. When skillet is hot, sear the lamb on all sides - about two minutes a side.
5. Place the skillet oven and cook for about one hour, or until lamb is 120º at it's center.
6. Let rest for about 7 minutes before serving.

Serves 3-4 people

3/9/12

Recipe: Classic Welsh Scones

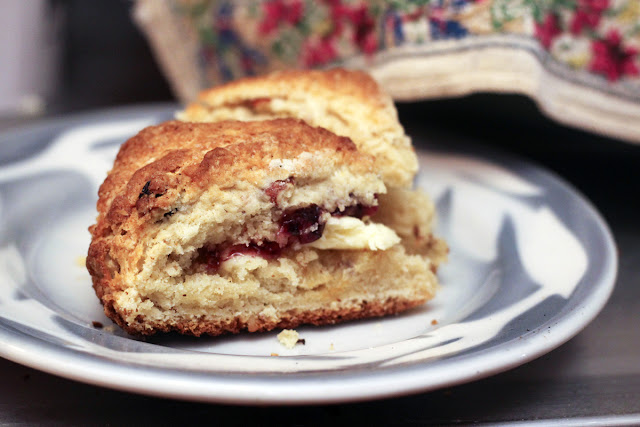
On a lazy weekend morning, nothing makes us happier than a big cup of coffee and something freshly baked. The problem with this equation is that, in your pre-pastry haze, you have to actually “freshly bake” something. Enter scones - the easiest thing ever to make, a catch-all for aging pantry staples, and the perfect not-too-sweet-not-too-savory vessel for butter, cream and jam. Seriously, you could make these in your sleep – which is basically what we did last weekend. 

The morning (ok, ok, afternoon) after a rousing game of Pictionary (ok, ok, we’re waaaay cooler than we sound), Silka rolled out of bed desperate for our favorite scones. And as she slowly flipped rummaged through the pantry, we realized that we’d been holding on to just a handful of raisins, almonds and walnuts. The nuts went into a pan to roast and the raisins into a hot water/left-over whiskey to plump up. After an easy mix of simple ingredients and a quick cooking time we were back on the couch contentedly snacking away and watching bad movies On Demand. Who could ask for more?!  

Welsh Scones
From The Modern Baker by Nick Malgieri

+ 2 1/4 cups All Purpose flour
+ 1/3 cup sugar
+ 1 tbsp baking powder
+ 1 tsp cream of tartar
+ 1/2 tsp salt
+ 8 tbsp (1 stick) cold, unsalted butter cut into 12 pieces
+ 1 large egg
+ 1/2 cup milk

Optional:
+ 1/2 cup of raisins, soaked in a mix of hot water and whiskey for 30 minutes
+ 1/2 cup nuts, roasted and coarsely chopped

1. Set a rack in the middle level of the oven and preheat to 450 degrees.
2. Combine the flour, sugar, baking powder, cream of tartar and salt in the bowl of a food processor fitted with the metal blade. Add the butter and pulse until the mixture is mealy but dry and powdery.
3. Invert the bowl of the food processor over a mixing bowl and carefully remove the blade. If you are adding raisins, nuts or both, gently stir them in now.
4. Quickly whisk the egg and milk together and use a fork to toss the egg mixture into the flour mixture, continuing to toss until all the flour mixture is evenly moistened.
5. Gently knead the dough 3 to 4 times, until it is smooth. Divide the dough in half and pres and pat each half into a disk about 6 inches in diameter. Place the two disks of dough a couple of inches apart on the prepared pan.
6. Use a floured bench scraper or knife to mark each disk of dough into 8 wedges, pressing straight down, and cutting no farther than halfway into the dough disk.
7. Bake the scones until they are very deep golden and firm, 12-15 minutes.
8. Slide each disk of baked scones onto a platter and use a knife to cut them completely along the markings into wedges.
9. Serve with butter, whipped cream and jam!